This is the presentation for my session at SQL Saturday, South Florida, June 9 2018
Link to download PPT: Download Presentation
This is the presentation for my session at SQL Saturday, South Florida, June 9 2018
Link to download PPT: Download Presentation
Here are the slides of my presentation at South Florida Code Camp 2018 on February 10th, 2018.
Recently released toolsets for AWS Lambda and Azure Functions are finally making “serverless” application development available to C# developers. Join me to explore the different features and development process of an Alexa Skill with .NET using the most popular serverless cloud technologies in the market: AWS Lambda, Azure Functions, AWS Dynamo DB and Azure CosmosDB. We’ll compare the development experience and features of Amazon AWS and Microsoft Azure Cloud Platforms.
After developing some skills using AWS Lambda, C# and the AWS Toolkit for Visual Studio. I encounter some advantages and disadvantages in the development Tools for the skills I’d like to develop . This post shows the steps to develop an Alexa Skill using Azure Functions.
Alexa with Azure Functions
Microsoft’s Serverless Computing equivalent to AWS Lambda are Azure Functions, which support .Net Framework up to 4.7. This allow us to leverage some .NET technologies, third-party .NET libraries and some NuGet not available with .NET Core with the availability of and consumption of other services within Azure ecosystem.
Alexa Skills + Azure Functions
In this post I will show how to create simple skill and how to handle the skill requests using Azure Functions. Using Azure Functions to handle the skill request allow us to use Function-as-a-Service (FaaS) easily integrated with Platform-as-a-Service (PaaS) in Azure like SQL Azure or Document DB.
Develop an Alexa skill using Azure Functions
I’ll show a simple skill will allow to add two numbers by saying to Alexa: add three plus seven.
The main goal is to use Alexa Skill and Azure Functions to implement this simple skill.
I used Visual Studio 2017 version 15.4.4 to develop this sample. Visual Studio 2017 Tools for Azure Functions are now available as part of the Azure development workload starting in the Visual Studio 2017 15.3 release. Do not use Visual Studio 2015, since there is no plans to update the Azure Functions Preview.
First, create a new project in VS, using the Azure Function template. Go to File -> New Project and then select the “Cloud” node under the “Visual C#” section and choose the “Azure Functions” project type.
Type: FunctionApp under Name Box.
The new created project contains these files:
These files are pretty much empty.
We’ll add a function to the project, by right clicking on the project in Solution Explorer, choose “Add” and then “New Azure Function”
In the Azure Function dialog, create a new function. Give it a name: AddFunction and then click Add.
Select HTTPTrigger – C# function, set its Access rights to Anonymous, and click OK.
Copy the following code to the AddFunction.cs file.
using Microsoft.Azure.WebJobs; using Microsoft.Azure.WebJobs.Extensions.Http; using Microsoft.Azure.WebJobs.Host; using System; using System.Net; using System.Net.Http; using System.Threading.Tasks; namespace FunctionApp { public static class AddFunction { [FunctionName("AddFunction")] public static async Task<HttpResponseMessage> Run([HttpTrigger(AuthorizationLevel.Anonymous, "get", "post", Route = null)]HttpRequestMessage req, TraceWriter log) { // Simple Function // Get request body dynamic data = await req.Content.ReadAsAsync<object>(); log.Info($"Content={data}"); if (data.request.type == "LaunchRequest") { // default launch request, let's just let them know what you can do log.Info($"Default LaunchRequest made"); return DefaultRequest(req); } else if (data.request.type == "IntentRequest") { // Set name to query string or body data string intentName = data.request.intent.name; log.Info($"intentName={intentName}"); switch (intentName) { case "AddIntent": var n1 = Convert.ToDouble(data.request.intent.slots["firstnum"].value); var n2 = Convert.ToDouble(data.request.intent.slots["secondnum"].value); double result = n1 + n2; string subject = result.ToString(); return req.CreateResponse(HttpStatusCode.OK, new { version = "1.0", sessionAttributes = new { }, response = new { outputSpeech = new { type = "PlainText", text = $"The result is {result.ToString()}." }, card = new { type = "Simple", title = "Alexa-Azure Simple Calculator", content = $"The result is {result.ToString()}." }, shouldEndSession = true } }); // Add more intents and default responses default: return DefaultRequest(req); } } else { return DefaultRequest(req); } } private static HttpResponseMessage DefaultRequest(HttpRequestMessage req) { return req.CreateResponse(HttpStatusCode.OK, new { version = "1.0", sessionAttributes = new { }, response = new { outputSpeech = new { type = "PlainText", text = "Welcome to this calculator that only knows how to add two numbers.\n Ask add two plus three" }, card = new { type = "Simple", title = "Alexa-Azure Simple Calculator", content = "Welcome to this calculator that only adds two number.\n Ask 2 + 3" }, shouldEndSession = true } }); } } }
Run locally and testing
You can test locally your function. When you run the project, copy the URL indicated in the screen below.
Test with Postman
Download Postman to your local computer to test your function.
Add the local function URL and set the following Headers:
Key | Value |
Content-Type | application/json |
Cache-Control | no-cache |
Copy the following code to the Body-Raw Box:
{ "session": { "new": true, "sessionId": "SessionId.9d9151ea-0794-44ca-a955-fdefcf4ab2fa", "application": { "applicationId": "amzn1.ask.skill.<Your ID>" }, "attributes": {}, "user": { "userId": "amzn1.ask.account.<User ID>" } }, "request": { "type": "LaunchRequest", "requestId": "EdwRequestId.32564f90-eddd-417a-a6fb-ed8d0a13d17b", "locale": "en-US", "timestamp": "2017-11-26T17:10:17Z" }, "context": { "AudioPlayer": { "playerActivity": "IDLE" }, "System": { "application": { "applicationId": "amzn1.ask. .<Your ID>" }, "user": { "userId": "amzn1.ask.account. .<User ID>" }, "device": { "supportedInterfaces": {} } } }, "version": "1.0" }
Ensure that Visual Studio is running your function project and set a breakpoint in the Run method in the AddFunction class. Send the request in Postman and this Launch the Skill.
The following JSON is using the Add Intent with two numbers. Copy this to the Raw box in Postman and send the request.
{ "session": { "new": false, "sessionId": "SessionId.9d9151ea-0794-44ca-a955-fdefcf4ab2fa", "application": { "applicationId": "amzn1.ask.skill.<App Id>" }, "attributes": {}, "user": { "userId": "amzn1.ask.account.<User Id>" } }, "request": { "type": "IntentRequest", "requestId": "EdwRequestId.22215e1e-ea06-452f-88ba-7ffad48ad9ce", "intent": { "name": "AddIntent", "slots": { "secondnum": { "name": "secondnum", "value": "7" }, "firstnum": { "name": "firstnum", "value": "6" } } }, "locale": "en-US", "timestamp": "2017-11-26T19:07:16Z" }, "context": { "AudioPlayer": { "playerActivity": "IDLE" }, "System": { "application": { "applicationId": "amzn1.ask.skill.<App Id>" }, "user": { "userId": "amzn1.ask.account.<User Id>" }, "device": { "supportedInterfaces": {} } } }, "version": "1.0" }
The result will be displayed in Postman.
Publish to Azure
Now the function was tested locally, we procced to publish it to Azure. Right click the project in the Solution explorer and select the menu publish. Then select “Azure Function App” and “Create New” and click Publish button.
Enter a unique name in “App Name”, I chose FunctionApp2017 is a unique name for Azure and Click Create.
Once your project is published, you’ll get the screen below including the Site URL.
Click the Site URL. Once the Azure Function is running, I can test again in Postman using the Site URL.
Create a New Alexa Skill
The second part is to create the Alexa Skill and integrate this with the Azure function. Open the AWS Developer Console.
Click “Get Started” and then “Add a New Skill”
Click “Add New Skill” button.
Add a Name and Invocation Name to your Skill.
Once you save this the Application Id will be generated.
Click Next to switch to the Configuration step and enter the following JSon text to the “Intent Schema” Box:
{ "intents": [ { "slots": [ { "name": "firstnum", "type": "AMAZON.NUMBER" }, { "name": "secondnum", "type": "AMAZON.NUMBER" } ], "intent": "AddIntent" } ] }
Add the following to the Sample Utterances:
AddIntent what is {firstnum} plus {secondnum} AddIntent add {firstnum} and {secondnum} AddIntent tell me the answer to {firstnum} and {secondnum}
Click Next. In the Configuration Section check HTTPS for the Endpoint as Amazon requires to use a valid, trusted certificate, which Azure functions provides, and add the Azure Site URL: https://functionapp2017.azurewebsites.net/api/AddFunction to the Default Endpoint URL.
Next in the “Service Simulator” you can test the launch intent using the invocation name assigned to your skill:
Alexa start my math
Then test the Add Intent using the Utterance:
Add six plus seven
Next you can enter the Global Fields information.
Next enter the Privacy and Compliance information.
Conclusion
Azure Function like AWS Lambda lets you run code without provisioning or managing servers. You pay only for the compute time you consume – there is no charge when your code is not running.
Having Alexa and Azure Function is a powerful combination, since Azure Function has full .NET Framework capabilities. Meanwhile AWS Lambda only supports .NET Core.
In a future Post, I’ll show how you can add the AlexaSkillsKit.NET, which is a library based on the same object model as Amazon’s AlexaSkillsKit for Java.
In this article, I’ll show the implementation of Row-Level-Security (RLS) with SQL 2016 and any .NET application like Web MVC, Web Forms, Web API, Windows App, etc. In previous articles, I showed you how to implement RLS in SQL 2016 and how client tools like Excel or Power BI can take advantage of this security. Now we’ll focus in .NET applications. Traditionally, we use to implement the security for data by coding the necessary logic using C# or VB.NET in the middle tier application.
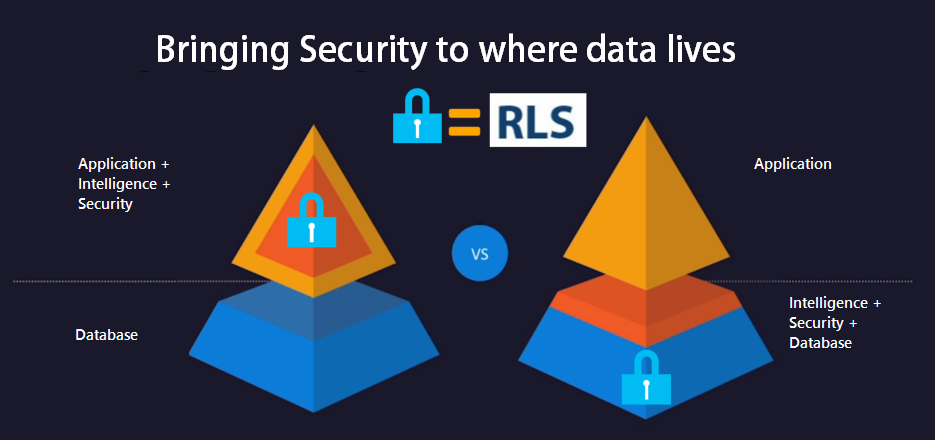
Now, SQL 2016 allows the implementation of RLS, the security logic can be implemented right in the database, reducing the security code in the .NET middle tier app and centralizing the security in the source database, so any application or third party tool can connect to the database and reuse the same RLS security.
The following sample shows how to implement RLS in SQL to allow any .NET application with or without Active Directory or using another Security Membership Framework to query a SQL Server 2016 database and use RLS.
In order to do this, the .NET application should set values in the SESSION_CONTEXT after connecting to the database, and then security policies in the database will be able to read the values from SESSION_CONTEXT and filter rows using the Context values.
This article uses the same database I use in other articles.
In Visual Studio, Create Wasp – ASP .NET Project – Check ASP Forms and MVC. You can implement this in any .NET Windows or Web application: Console App, MVC, Web API, etc. For simplicity we’ll use Web Forms, but you might also implement this using Web API and use Angular for your web app.
Select MVC Template, Windows Authentication.
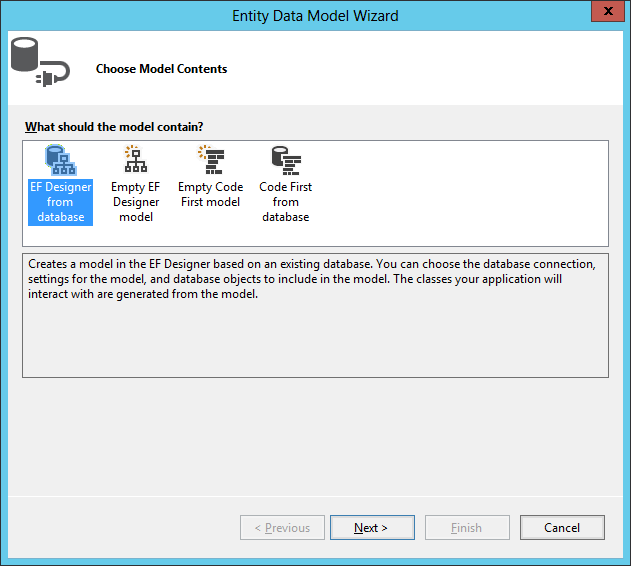
Add new item to the project: ADO.NET Entity Data Model, to the sample database. This will create a reference to Entity Framework. Call the model AdventureWorksModel.
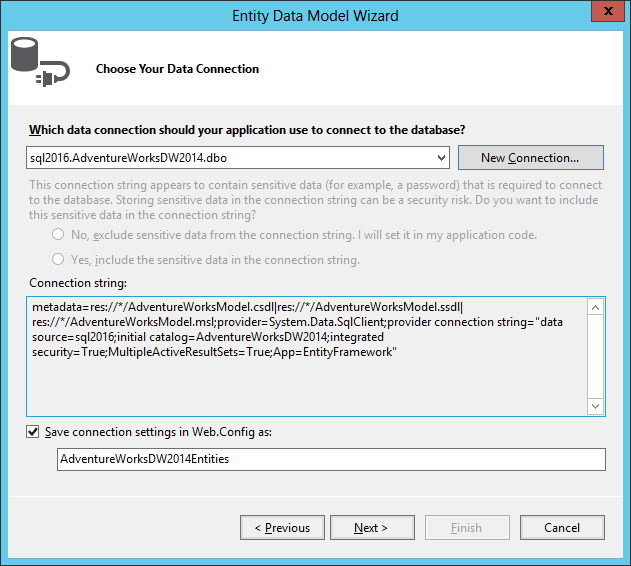
Build the connection to the database.
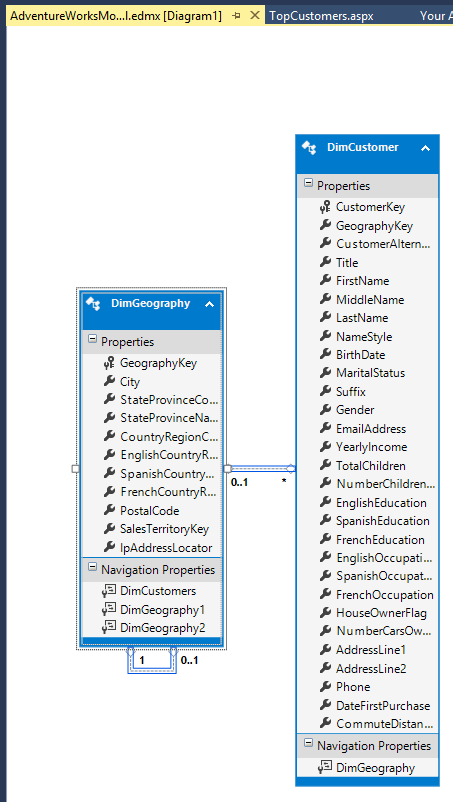
For this sample, we’ll chose the tables DimCustomer and DimGeography.
You’ll get this model.
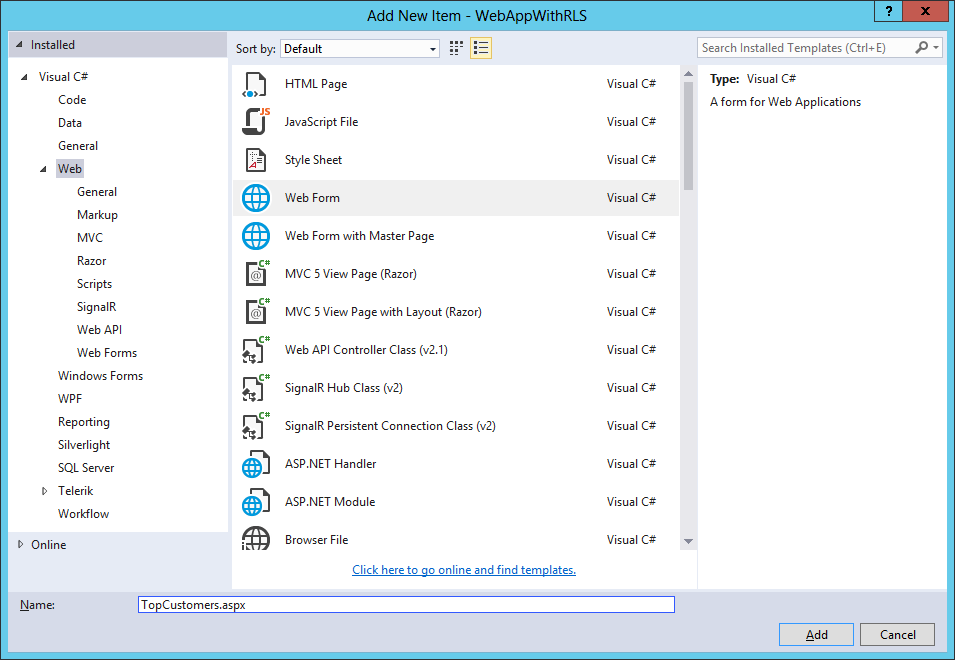
Create a Web Form called: TopCustomers.aspx. Add a RadGrid and ScriptManager Control to the Form. Add this code to code behind file TopCustomers.aspx.cs:
I add a Telerik Radgrid (You can add any control you want to display a list of customers) and the script manager.
using System; using System.Collections.Generic; using System.Linq; using System.Web; using System.Web.UI; using System.Web.UI.WebControls; namespace WebAppWithRLS { public partial class TopCustomers : System.Web.UI.Page { protected void Page_Load(object sender, EventArgs e) { AdventureWorksDW2014Entities db = new AdventureWorksDW2014Entities(); var topCustomers = from customer in db.DimCustomers join geography in db.DimGeographies on customer.GeographyKey equals geography.GeographyKey select new { Name = customer.FirstName + " " + customer.LastName, geography.EnglishCountryRegionName }; RadGrid1.DataSource = topCustomers.ToList().Take(100); RadGrid1.DataBind(); } }
Set the TopCustomers.aspx page as “Start Page”
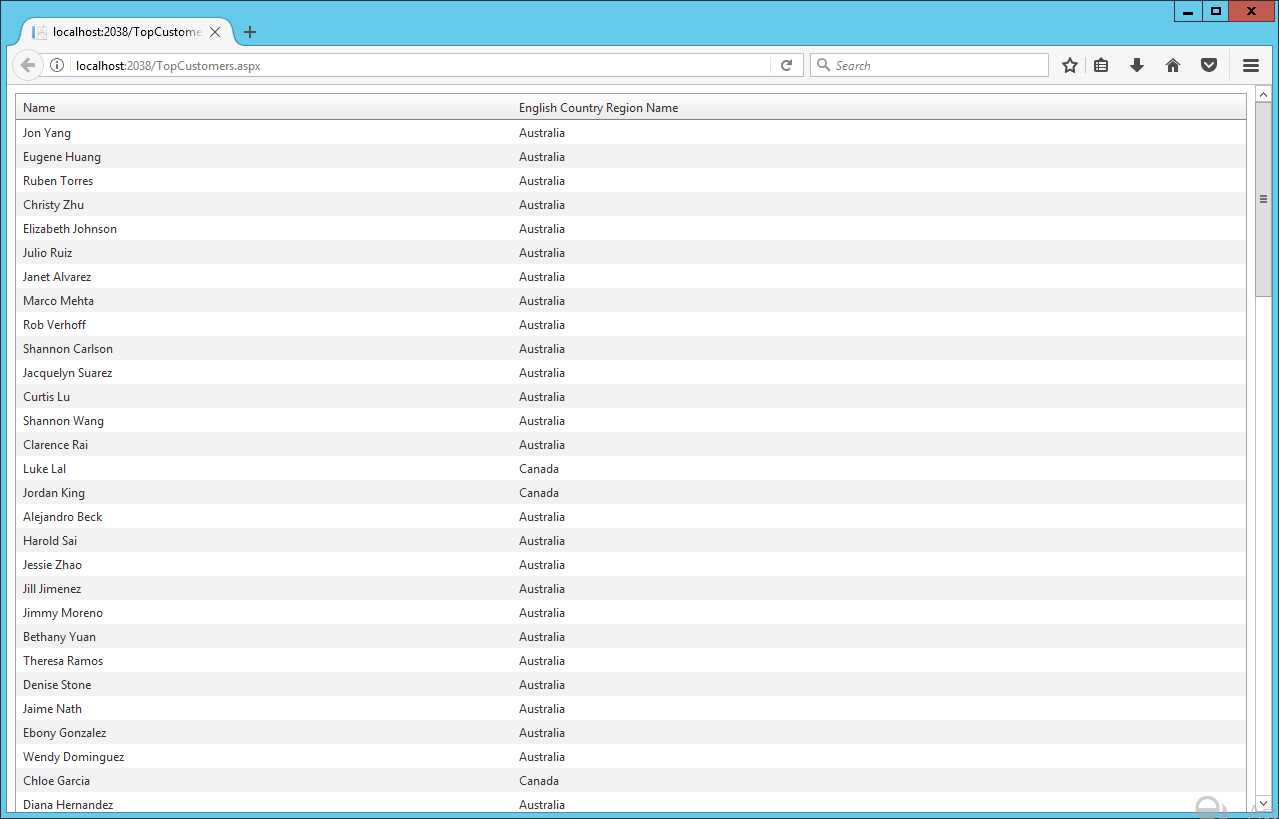
Run the application in Visual Studio.
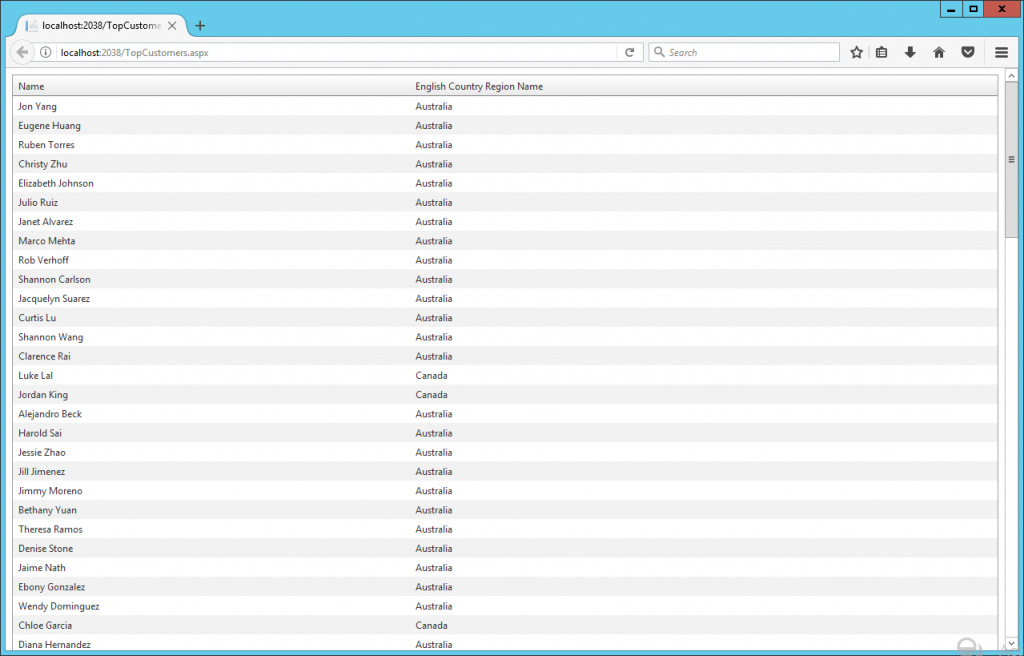
The page shows records from Australia and Canada. Even though the user gwilliams belongs to the Active Directory group “AW United Kingdom” so it should retrieve customer records from England only.
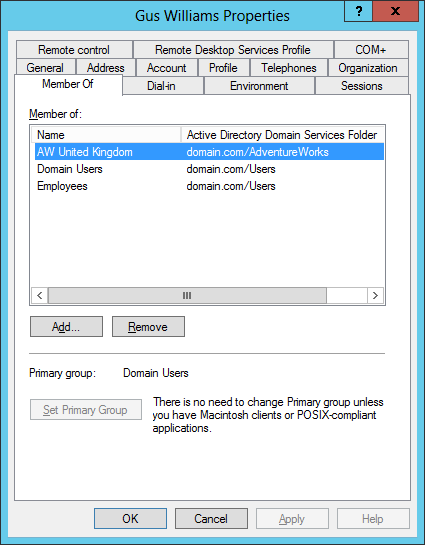
The user gwilliams is logged to the ASP .NET application, even though the Web App becomes a middle tier application that connects to the database using another middle tier user. In visual studio is the user account executing running visual studio and in IIS is the AppPool configured user.
The way to resolve go around this scenario is to send the context values in our context session before executing the SQL query or command, so SQL 2016 RLS can read this values and apply the corresponding security.
using System; using System.Collections.Generic; using System.Linq; using System.Web; using System.Data.Common; using System.Data.Entity; using System.Data.Entity.Infrastructure.Interception; namespace WebAppWithRLS.Models { public class SessionContextInterceptor: IDbConnectionInterceptor { public void Opened(DbConnection connection, DbConnectionInterceptionContext interceptionContext) { // Set SESSION_CONTEXT to current UserId whenever EF opens a connection try { var loginName = System.Web.HttpContext.Current.User.Identity.Name; if (loginName != null) { DbCommand cmd = connection.CreateCommand(); cmd.CommandText = "EXEC sp_set_session_context @key=N'LoginName', @value=@LoginName"; DbParameter param = cmd.CreateParameter(); param.ParameterName = "@LoginName"; param.Value = loginName; cmd.Parameters.Add(param); cmd.ExecuteNonQuery(); } } catch (System.NullReferenceException) { // If no user is logged in, leave SESSION_CONTEXT null (all rows will be filtered) } } public void Opening(DbConnection connection, DbConnectionInterceptionContext interceptionContext) { } public void BeganTransaction(DbConnection connection, BeginTransactionInterceptionContext interceptionContext) { } public void BeginningTransaction(DbConnection connection, BeginTransactionInterceptionContext interceptionContext) { } public void Closed(DbConnection connection, DbConnectionInterceptionContext interceptionContext) { } public void Closing(DbConnection connection, DbConnectionInterceptionContext interceptionContext) { } public void ConnectionStringGetting(DbConnection connection, DbConnectionInterceptionContext < string > interceptionContext) { } public void ConnectionStringGot(DbConnection connection, DbConnectionInterceptionContext < string > interceptionContext) { } public void ConnectionStringSet(DbConnection connection, DbConnectionPropertyInterceptionContext < string > interceptionContext) { } public void ConnectionStringSetting(DbConnection connection, DbConnectionPropertyInterceptionContext < string > interceptionContext) { } public void ConnectionTimeoutGetting(DbConnection connection, DbConnectionInterceptionContext < int > interceptionContext) { } public void ConnectionTimeoutGot(DbConnection connection, DbConnectionInterceptionContext < int > interceptionContext) { } public void DataSourceGetting(DbConnection connection, DbConnectionInterceptionContext < string > interceptionContext) { } public void DataSourceGot(DbConnection connection, DbConnectionInterceptionContext < string > interceptionContext) { } public void DatabaseGetting(DbConnection connection, DbConnectionInterceptionContext < string > interceptionContext) { } public void DatabaseGot(DbConnection connection, DbConnectionInterceptionContext < string > interceptionContext) { } public void Disposed(DbConnection connection, DbConnectionInterceptionContext interceptionContext) { } public void Disposing(DbConnection connection, DbConnectionInterceptionContext interceptionContext) { } public void EnlistedTransaction(DbConnection connection, EnlistTransactionInterceptionContext interceptionContext) { } public void EnlistingTransaction(DbConnection connection, EnlistTransactionInterceptionContext interceptionContext) { } public void ServerVersionGetting(DbConnection connection, DbConnectionInterceptionContext < string > interceptionContext) { } public void ServerVersionGot(DbConnection connection, DbConnectionInterceptionContext < string > interceptionContext) { } public void StateGetting(DbConnection connection, DbConnectionInterceptionContext < System.Data.ConnectionState > interceptionContext) { } public void StateGot(DbConnection connection, DbConnectionInterceptionContext < System.Data.ConnectionState > interceptionContext) { } } public class SessionContextConfiguration: DbConfiguration { public SessionContextConfiguration() { AddInterceptor(new SessionContextInterceptor()); } } }
Create the class SessionContextInterceptor.cs and add the following code:
The class SessionContextInterceptor as the name suggest will intercept a SQL command from EF model and execute the code in the Opened method. Using sp_set_session_context we set the value of @LoginName variable. This variable will be alive and accessible form SQL Server only for that session.
Now, let’s implement the RLS in SQL. We create the predicate function which reads the context values using SESSION_CONTEXT(N’LoginName’).
USE [AdventureWorksDW2014] GO CREATE FUNCTION RLS.GeographyAccessPredicate(@GeographyKey AS INT) RETURNS TABLE WITH SCHEMABINDING AS RETURN SELECT 1 AS AccessResult FROM dbo.DimGeography G INNER JOIN dbo.DimActiveDirectoryUser U ON G.GeographyKey = @GeographyKey AND ( ( U.LoginName = CAST(SESSION_CONTEXT(N'LoginName') AS nvarchar(150)) OR U.LoginName = REPLACE(SUSER_NAME(), 'DOMAIN\', '') ) AND G.EnglishCountryRegionName = REPLACE(U.GroupName,'AW ','') ) GO CREATE SECURITY POLICY RLS.AWSecurityPolicy ADD FILTER PREDICATE RLS.GeographyAccessPredicate(GeographyKey) ON dbo.DimCustomer
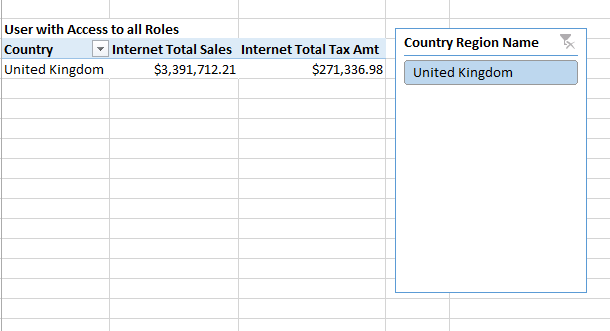
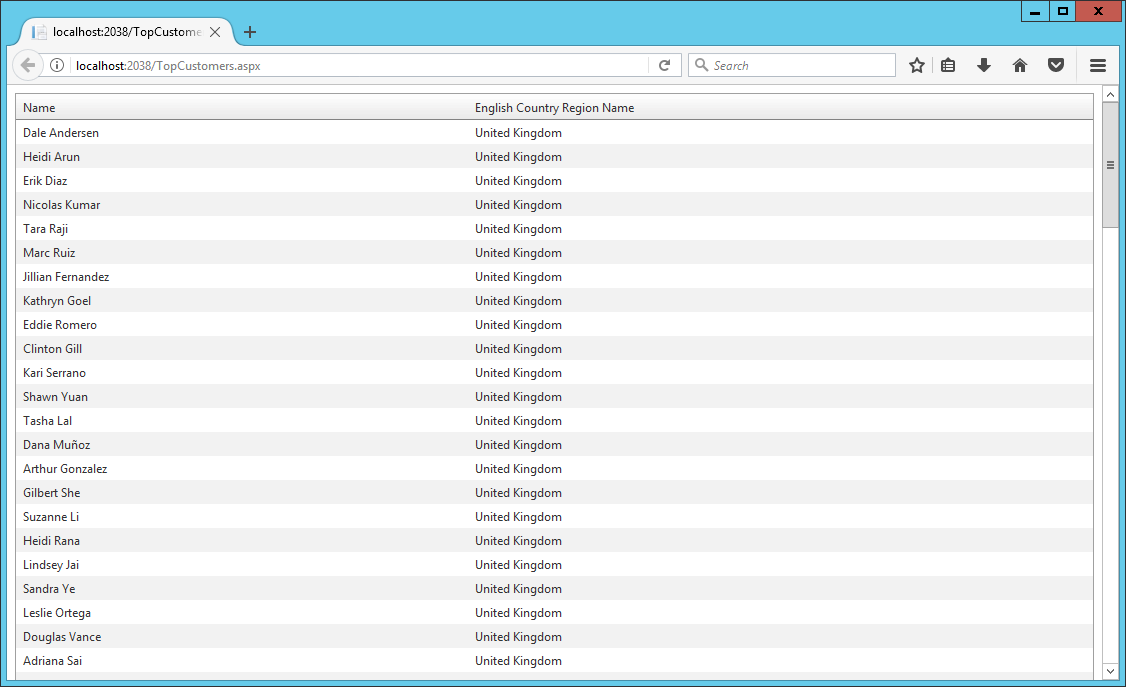
After that we run he program and now we can see only customers from United Kingdom, so the records are filtered by using the user name gwilliams.
In this article, I showed how RLS can be implemented regardless of the type of authentication (Database Custom Membership, Windows, Forms, OWIN, etc.) in our .NET application and type of .NET application: Console App, Window App, Web API, ASP .NET MVC/Web Forms, etc.
SSAS 2016 Tabular On Premise with Row-Level Security and Active Directory
This is a series of articles related to RLS (Row Level Security), started with https://hectorv.com/bringing-security-where-data-lives
We are going to implement RLS (Row-Level Security) in SSAS (SQL Server Analysis Services) Tabular mode.
In our use case: Adventure Works Internet Sales, the goal is to restrict access to all customer data to specific users. The user GHowell, is a sales agent based on United States. This user should only be able to retrieve customers from United States when query the SSAS database using Excel, Power BI desktop or any other BI tool.
To implement RLS, let’s download a Tabular Project sample “Adventure Works Internet Sales Tabular Sample Solution”, then we’ll add RLS to this project.
Go to:
https://msftdbprodsamples.codeplex.com/releases/view/125550
Download Adventure Works Internet Sales Tabular Sample Solution from the link as shown below.
Open the project in Visual Studio and deploy it in your SSAS instance. We should apply RSL security to the Customer table. The customer table information from customers from different countries and “Adventure Works” has sales agents in different countries that should only have access to the corresponding customer information.
Notice the relationship between the Customer and Geography tables. The Row Level Security is disabled. Our plan is to apply RLS to the Geography table and the RLS will apply automatically to the Customer table, since there is a relationship between these two tables.
We are going to create a Role which have the security rules and membership.
=Geography[Country Region Code] = “GB”
Now, we add the membership in the Members tab. We add the active directory group that contains the “United Kingdom” sales agents.
Let’s test it!
In order to do our security test, we’ll use Excel as a BI client tool. In Excel go to Data – From Other Sources and select “From Analysis Services”.
Then, you have to enter your SSAS instance. After this a data connection in your Excel file is created.
You can create a Pivot table like the one shown below. It will show all users since probably your user is an administrator will access to all information.
Now, In order to test a specific user, we need to change the connection. In Excel, go to Data, Connections and select the SSAS connection that you created before. Go to the definition tab as shown below.
You are going to add an Effective user name to the connection string to simulate a query executed as another user. This will be allow only if you have administrator rights in the SSAS instance.
Try adding this at the end of the Connection String:
;EffectiveUserName=DOMAIN\GWilliams;
GWilliams is an active directory user that belongs to the “Internet Sales United Kingdom” AD group.
Click OK and you’ll see the data filtered only United Kingdom information as expected.
If you profile SSAS, you’ll be able to see that the Effective User name is sent with the query, then SSAS can check the AD membership and apply the corresponding Filter Rules defined in the SSAS Roles. Notice that Excel generate MDX queries instead of DAX queries.
In this article we learn how to implement RLS in SSAS tabular mode, and how to test it. In a following article, I’ll show you how to use this Tabular RLS security from Power BI with live connection.
There was extra effort to create this kind of report in PowerBI, back in April I published an article to implement different formats in the same column.
https://hectorv.com/table-or-matrix-for-side-by-side-column-comparison-with-columns-with-different-formats-in-the-same-column
Now, tt is extremely easy to have same result with no need of DAX measures to workaround different values, formats and alignment in a column.
You can download this Power BI desktop file with this link:
https://1drv.ms/u/s!AjlEiXFjD5fu2Sh0BaL-OPep9-Pe
There are many cases where we need to use a table or a matrix and we need to specify different formats in the same column. Showing the format with the numeric values makes the report easier to read than a simple number with no units.
In the case of this financial report below, we can see three different formats in the same column:
Currency ($), Currency and Thousand ($K), and Percent (%).
Another example is a side by side comparison of products. In the case below, we have different formats like: text, mAh, decimal number, Whole number and Amp formats, all of them in the same column.
I’ll show you this solution based on financial sample data downloaded from:
This spreadsheet will be imported using Power BI desktop and you have to choose the worksheet: financial. Notice that this solution works for both: Power BI imported mode and live connection mode to SSAS Tabular. In the case of SSAS Tabular, you would have to import the excel spreadsheet in the Visual Studio Project.
I created a flag URL for the image, which is not part of the objective for this article. Even though, I’ll show you the calculated column formula created in the Financial Table:
Flag = "https://image.ibb.co/" & SWITCH([Country],"France","d4vwba/fr.png","Mexico","h8uHhF/mx.png","Germany","nGmV2F/de.png","Canada","dsjuUv/ca.png","United States of America","c023NF/us.png")
The following table was easy to create. Each country has a row and we can do a row by row comparison.
Even though is not what we are looking for. We are trying to get a side by side column comparison. We can create a matrix as shown below.
This is the Matrix Report version, after changing the flag and Country fields to the Column section in the Matrix. All fields under the configured Values section are shown as multiple columns.
What I really want is only one column per country and also the columns header in the left side of the table as the very first column.
The Solution
In the formatting options under Values go and turn on the new formatting option: “Show in rows”.
This will show the table well align and with different formats under the same column.
We add some slicers and we have both versions side by side matrix and simple table.
There are some cases where the side by side comparison in column and the formatted values are much easier to read than table with rows by row comparison. Especially, when there are multiple items or rows, it is easier for the end-user to compare columns side by side, where you can scroll up and down rather than scroll the table horizontally in a row by row comparison.
You can download this Power BI desktop file with this link:
In the previous article, I introduced a simple way to implement Row-Level-Security implementation for Microsoft SQL Server 2016 database with Active Directory.
Here, I’ll show you a more efficient way to implement RLS when you deal with millions of records in your database and thousands of users in your active directory.
Below is the original implementation of a RLS security predicate:
CREATE FUNCTION RLS.GeographyAccessPredicate(@GeographyKey AS INT) RETURNS TABLE WITH SCHEMABINDING AS RETURN SELECT 1 AS AccessResult FROM dbo.DimGeography G WHERE G.GeographyKey = @GeographyKey AND ( ( G.CountryRegionCode = 'US' AND IS_MEMBER('DOMAIN\AW United States') = 1 ) OR ( G.CountryRegionCode = 'GB' AND IS_MEMBER('DOMAIN\AW United Kingdom') = 1 ) OR ( G.CountryRegionCode = 'DE' AND IS_MEMBER('DOMAIN\AW Germany') = 1 ) OR ( G.CountryRegionCode = 'FR' AND IS_MEMBER('DOMAIN\AW France') = 1 ) OR ( G.CountryRegionCode = 'CA' AND IS_MEMBER('DOMAIN\AW Canada') = 1 ) OR ( G.CountryRegionCode = 'AU' AND IS_MEMBER('DOMAIN\AW Australia') = 1 ) )
There are two performance issues in this filter predicate. First, there is a WHERE condition that slows down the query performance. The GeographyAccessPredicate function contains OR conditions for each country, which it will denied the use of indexes in the tables.
Second, we use a function called IS_MEMBER, which evaluate whether the current user is a member of the specified Active Directory group. This function will execute poorly when we query tables with millions of rows and we have thousands of active directory users and groups in our domain.
In order to improve the performance, instead of calling IS_MEMBER function, I’m going to create a table in the database to keep Active Directory users and groups. This Active Directory user and group table will allow me to join the data with the table and remove the function IS_MEMBER from the security policy predicate. It will simplify and improve the performance of the query execution.
CREATE TABLE [dbo].[DimActiveDirectoryUser]( [LoginName] [varchar](50) NOT NULL, [GroupName] [varchar](150) NOT NULL, CONSTRAINT [PK_DimActiveDirectoryUser] PRIMARY KEY CLUSTERED ( [LoginName] ASC, [GroupName] ASC )WITH (PAD_INDEX = OFF, STATISTICS_NORECOMPUTE = OFF, IGNORE_DUP_KEY = OFF, ALLOW_ROW_LOCKS = ON, ALLOW_PAGE_LOCKS = ON) ON [PRIMARY] ) ON [PRIMARY] In order to populate this table, we can execute a Power Shell script or create a ADSI linked server. In this article, I’ll use ADSI linked server: USE [master] GO EXEC master.dbo.sp_addlinkedserver @server = N'ADSI', @srvproduct=N'Active Directory Service Interfaces', @provider=N'ADSDSOObject', @datasrc=N'adsdatasource' EXEC master.dbo.sp_addlinkedsrvlogin @rmtsrvname=N'ADSI',@useself=N'False',@locallogin=NULL,@rmtuser=N'domain\YourUser',@rmtpassword='Your Password' GO EXEC master.dbo.sp_serveroption @server=N'ADSI', @optname=N'collation compatible', @optvalue=N'false' GO EXEC master.dbo.sp_serveroption @server=N'ADSI', @optname=N'data access', @optvalue=N'true' GO EXEC master.dbo.sp_serveroption @server=N'ADSI', @optname=N'dist', @optvalue=N'false' GO EXEC master.dbo.sp_serveroption @server=N'ADSI', @optname=N'pub', @optvalue=N'false' GO EXEC master.dbo.sp_serveroption @server=N'ADSI', @optname=N'rpc', @optvalue=N'false' GO EXEC master.dbo.sp_serveroption @server=N'ADSI', @optname=N'rpc out', @optvalue=N'false' GO EXEC master.dbo.sp_serveroption @server=N'ADSI', @optname=N'sub', @optvalue=N'false' GO EXEC master.dbo.sp_serveroption @server=N'ADSI', @optname=N'connect timeout', @optvalue=N'0' GO EXEC master.dbo.sp_serveroption @server=N'ADSI', @optname=N'collation name', @optvalue=null GO EXEC master.dbo.sp_serveroption @server=N'ADSI', @optname=N'lazy schema validation', @optvalue=N'false' GO EXEC master.dbo.sp_serveroption @server=N'ADSI', @optname=N'query timeout', @optvalue=N'0' GO EXEC master.dbo.sp_serveroption @server=N'ADSI', @optname=N'use remote collation', @optvalue=N'true' GO EXEC master.dbo.sp_serveroption @server=N'ADSI', @optname=N'remote proc transaction promotion', @optvalue=N'true' GO
Be sure to replace the values for the following parameters @rmtuser=N’domain\YourUser’,@rmtpassword=’Your Password’.
The following is the script used to synchronize our active directory with the new table DimActiveDirectoryUser in the AdventureWorks database. Notice that I only synchronize the groups that start with the wildcard: “AW*”, since they are the only groups used in my application.
USE AdventureWorksDW2014 GO TRUNCATE TABLE DimActiveDirectoryUser GO DECLARE @GroupName VARCHAR(50) DECLARE db_cursor CURSOR FOR SELECT CN FROM OpenQuery(ADSI, 'SELECT cn, ADsPath FROM ''LDAP://DC=domain,DC=com'' WHERE objectCategory=''group'' AND cn=''AW*''' ) OPEN db_cursor FETCH NEXT FROM db_cursor INTO @GroupName WHILE @@FETCH_STATUS = 0 BEGIN DECLARE @OPENQUERY nvarchar(4000), @TSQL nvarchar(4000), @LinkedServer nvarchar(4000) SET @LinkedServer = 'ADSI' SET @OPENQUERY = 'INSERT INTO DimActiveDirectoryUser(LoginName, GroupName) ' SET @OPENQUERY = @OPENQUERY + ' SELECT sAMAccountName, ''' + @GroupName + ''' FROM OPENQUERY('+ @LinkedServer + ',''' --SET @OPENQUERY = 'SELECT sAMAccountName as Login, CN as Name, GivenName as FirstName,SN as LastName, DisplayName as FullName, UserAccountControl FROM OPENQUERY('+ @LinkedServer + ',''' SET @TSQL = 'SELECT sAMAccountname,givenname,sn,displayname,useraccountcontrol,CN, department FROM ''''LDAP://domain.com/DC=domain,DC=com''''' SET @TSQL = @TSQL + ' WHERE objectCategory=''''person'''' ' SET @TSQL = @TSQL + ' AND objectClass=''''user''''' SET @TSQL = @TSQL + ' AND memberOf=''''CN=' + @GroupName + ',OU=AdventureWorks,DC=domain,DC=com'''' ' SET @TSQL = @TSQL + ' '')' PRINT @TSQL EXEC (@OPENQUERY+@TSQL) PRINT @TSQL FETCH NEXT FROM db_cursor INTO @GroupName END CLOSE db_cursor DEALLOCATE db_cursor GO -- Update values to Match Predicate Conditions UPDATE DimActiveDirectoryUser SET LoginName = 'DOMAIN\' + LoginName, GroupName = REPLACE(GroupName,'AW ','')
Notice that the last update to the LoginName and GroupName facilitates a better match in our security predicate.
Finally, the security predicate is simplified. No more OR conditions or IS_MEMBER function in the security predicate. GeographyAccessPredicate is a join between the DimGeography and the DimActiveDirectoryUser tables.
DROP SECURITY POLICY RLS.AWSecurityPolicy go DROP FUNCTION RLS.GeographyAccessPredicate go CREATE FUNCTION RLS.GeographyAccessPredicate(@GeographyKey AS INT) RETURNS TABLE WITH SCHEMABINDING AS RETURN SELECT 1 AS AccessResult FROM dbo.DimGeography G INNER JOIN dbo.DimActiveDirectoryUser U ON G.GeographyKey = @GeographyKey AND U.LoginName = SUSER_NAME() AND G.EnglishCountryRegionName = U.GroupName GO CREATE SECURITY POLICY RLS.AWSecurityPolicy ADD FILTER PREDICATE RLS.GeographyAccessPredicate(GeographyKey) ON dbo.DimCustomer
The performance was improved 2X compared with initial version of the security predicate. You’ll notice this difference when dealing with millions of records and thousand users in your active directory. It also depends of the SQL Server configuration.
The following is the query execution plan with the RLS security.
-- Show Plan with Security ALTER SECURITY POLICY RLS.AWSecurityPolicy WITH (STATE=ON) GO SET SHOWPLAN_ALL ON GO SELECT COUNT(*) FROM DimCustomer GO SET SHOWPLAN_ALL OFF
When implementing RLS keep in mind that there is always an overhead in performance when querying a secured table with RLS. The performance of the queries results depends on how you implement the WHERE condition logic and this logic can be optimized using indexes in the joined fields and avoiding complex functions in your RLS security policy.
In this article, I’ll explain a basic use case of Row-Level-Security implementation for Microsoft SQL Server 2016 database.
The AdventureWorks Database supports a fictitious, multinational manufacturing company called Adventure Works Cycles. This company sells products around the world. Sales are ordered from five different countries like Unites States, Germany, United Kingdom, Canada, France and Australia.
Adventure Works Cycles has Sales Teams in each of these countries. These teams should only access to data from their corresponding country.
In the picture below, we can see that Ginger Howell, a sales representative from the United States Sales Team, is trying to get information from the Customer Dimension table (Dim Customer).
When GHowell send the query: “SELECT * FROM DimCustomer” to the database. The DimCustomer table contains customer records not only from USA, but from other countries. The database should retrieve to GHowell only the records corresponding to United States Customers.
SQL Server 2016 introduced a new feature the database engine: Row-Level-Security. Row Level Security (RLS) is a concept that provides security at the table row level within the database layer, instead of at the application layer. RLS is accomplished by using a function (predicate) and the security policy that should be implemented by a database administrator.
We are going to use Adventure Works Database as a sample. You can download the database from this link: https://msftdbprodsamples.codeplex.com/releases/view/125550
Download and restore the Adventure Works DW 2014 Full Database Backup.zip
The following is a simplified diagram that includes only three tables from the Adventure Works database: DimCustomer, DimGeography and FactInternetSales
Now, we have Active directory groups corresponding to each country’s sales team.
We create a SQL Login for each of these Active Directory groups.
With the SQL Logins created, we can implement our security policy.
First, we create a new schema, just to keep SQL objects separate from the existing objects.
CREATE SCHEMA RLS
We create the function that we’ll use as a filter predicate for the security policy.
The predicate function is an inline table valued function. This function returns 1 when a row in the DimGeography table matches the corresponding CountryRegionCode (G.CountryRegionCode = ‘US’) and the user executing the query belongs to the corresponding Active Directory group (IS_MEMBER(‘DOMAIN\AW United States’) = 1).
CREATE FUNCTION RLS.GeographyAccessPredicate(@GeographyKey AS INT) RETURNS TABLE WITH SCHEMABINDING AS RETURN SELECT 1 AS AccessResult FROM dbo.DimGeography G WHERE G.GeographyKey = @GeographyKey AND ( ( G.CountryRegionCode = 'US' AND IS_MEMBER('DOMAIN\AW United States') = 1 ) OR ( G.CountryRegionCode = 'GB' AND IS_MEMBER('DOMAIN\AW United Kingdom') = 1 ) OR ( G.CountryRegionCode = 'DE' AND IS_MEMBER('DOMAIN\AW Germany') = 1 ) OR ( G.CountryRegionCode = 'FR' AND IS_MEMBER('DOMAIN\AW France') = 1 ) OR ( G.CountryRegionCode = 'CA' AND IS_MEMBER('DOMAIN\AW Canada') = 1 ) OR ( G.CountryRegionCode = 'AU' AND IS_MEMBER('DOMAIN\AW Australia') = 1 ) )
Finally, we add the function as filter predicate on the DimCustomer table:
CREATE SECURITY POLICY RLS.AWSecurityPolicy ADD FILTER PREDICATE RLS.GeographyAccessPredicate(GeographyKey) ON dbo.DimCustomer
After this our Row-Level-Security is implemented!
Now, we’ll test it by running some scripts. We impersonate a user, GHowell, which belongs to the United States Active Directory.
EXECUTE AS LOGIN = 'DOMAIN\GHowell' -- United States Group SELECT SUSER_NAME() SELECT FirstName, LastName, EnglishCountryRegionName FROM dbo.DimCustomer C INNER JOIN dbo.DimGeography G ON C.GeographyKey = G.GeographyKey
The query returns only customers from United States region as expected.
Execute the Revert command to return the execution context back to your user.
REVERT;
Now let’s see what happens behind scenes when the query is executed.
-- Show Plan without Security GRANT SHOWPLAN TO [DOMAIN\Administrator] GO ALTER SECURITY POLICY RLS.AWSecurityPolicy WITH (STATE=OFF) GO SET SHOWPLAN_ALL ON GO SELECT COUNT(*) FROM DimCustomer GO SET SHOWPLAN_ALL OFF
The execution plan shows a simple scan to the DimCustomer table, when the security policy is off.
Now, let’s see how is the execution plan when the security policy is applied.
-- Show Plan with Security ALTER SECURITY POLICY RLS.AWSecurityPolicy WITH (STATE=ON) GO SET SHOWPLAN_ALL ON GO SELECT COUNT(*) FROM DimCustomer GO SET SHOWPLAN_ALL OFF
When the security policy applied, the execution plan shows an extra join. The filter predicate is being applied and joined to the DimCustomer table.
There is an overhead when Row-Level-Security is applied. This impact in the performance of the queries is affected by the implementation of the filter predicate function.
In our filter predicate function GeographyAccessPredicate, there is a WHERE condition that slows down the query performance. The GeographyAccessPredicate function contains OR conditions for each country, which it will denied the use of indexes in the tables.
Second, we use the function called IS_MEMBER, which evaluate whether the current user is a member of the specified Active Directory group. This also will execute poorly when we query tables with millions rows.
In the next article, I will show a better approach for the predicate function, to speed up the query performance.
https://hectorv.com/wp-content/uploads/sites/3/2017/06/RLS-SQL-Saturday-1.pptx